Large mSnow Panel BUILD

Large mSnow Panel Features/Recommendations

  • 42″ x 42″ Size with “Ground Runners”
  • Ground Runners link panels
  • They stiffen panels for smoother riding
  • Linking keeps them from moving
  • Paint recommended (panel lasts longer)
  • Store inside when not in use (lasts longer)
  • Do not use pressure treated plywood – waste of money
  • Painting untreated plywood will make it last longer without warping

Materials/Tools Required

  • 2 Panels Made with 1 Sheet of Plywood
  • 5/8″ BCX or CDX best (1/2″ will work too)
  • “X” stands for outdoor-rated panel construction
  • 24 Backyard mSnow Tiles
  • Approx. 30(ea) 1-1/4″ Deck Screws
  • Tape measure
  • Sharpie
  • 4′ Straight Line or Chalk Line
  • Skill Saw
  • Drill and/or Impact Driver

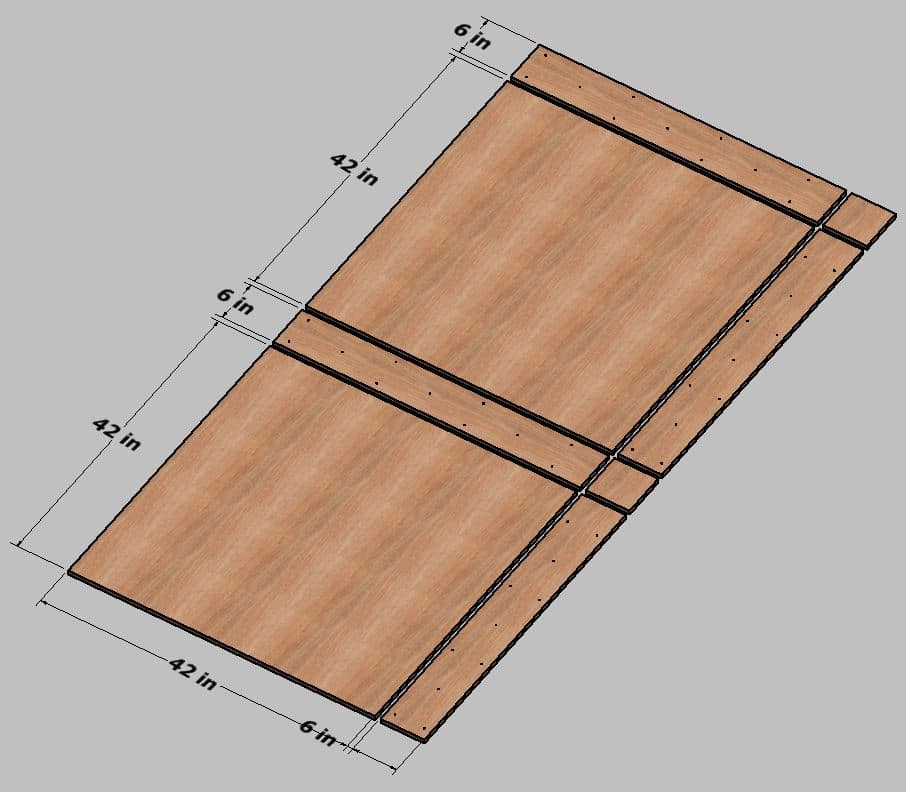
Cutting Plan

  • Measure and mark as shown
  • For long lines, use chalk box or straight edge
  • Cut carefully with skil saw
  • May sand edges to prevent slivers
  • IF PAINTING, NOW IS THE TIME
  • Paint individual pieces and let dry before moving on to the next step

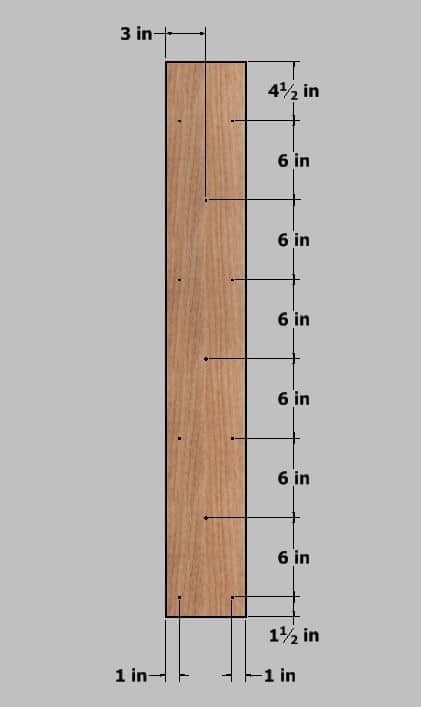
Ground Runner Pre-Drilling Plan

  • Pre-Drilling locates screws
  • Also provides stronger clamping
  • Measure and mark holes as shown
  • Doesn’t need to be exact
  • Pre-drill with 1/8″ Drill Bit

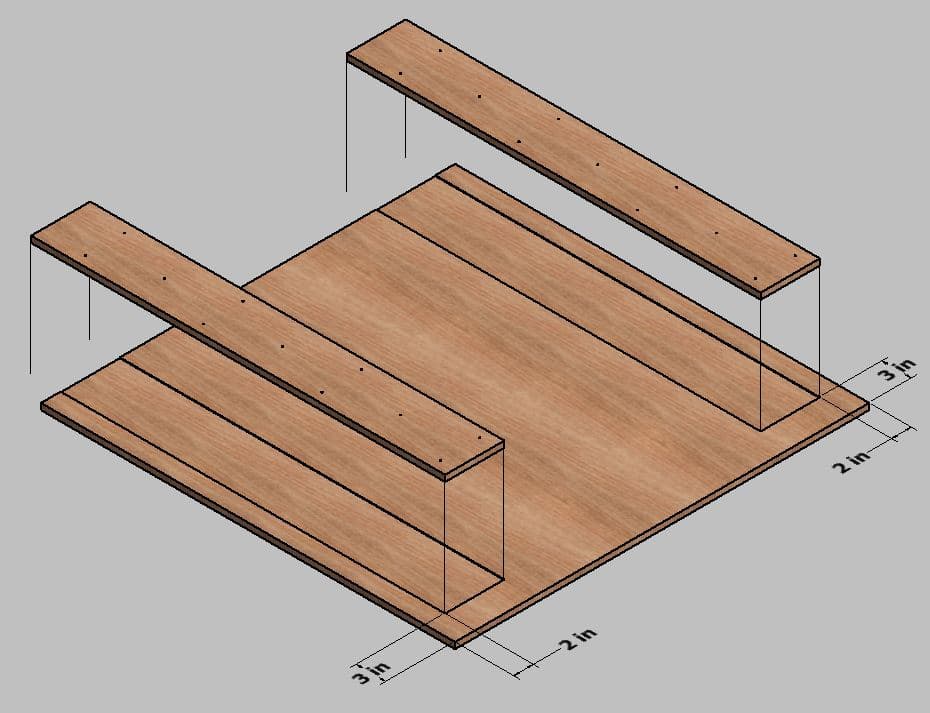
Ground Runner Location Marking

  • Make marks for the position of both ground runners
  • Align plywood with grains as shown
  • Plywood grain alignment should align with sliding direction

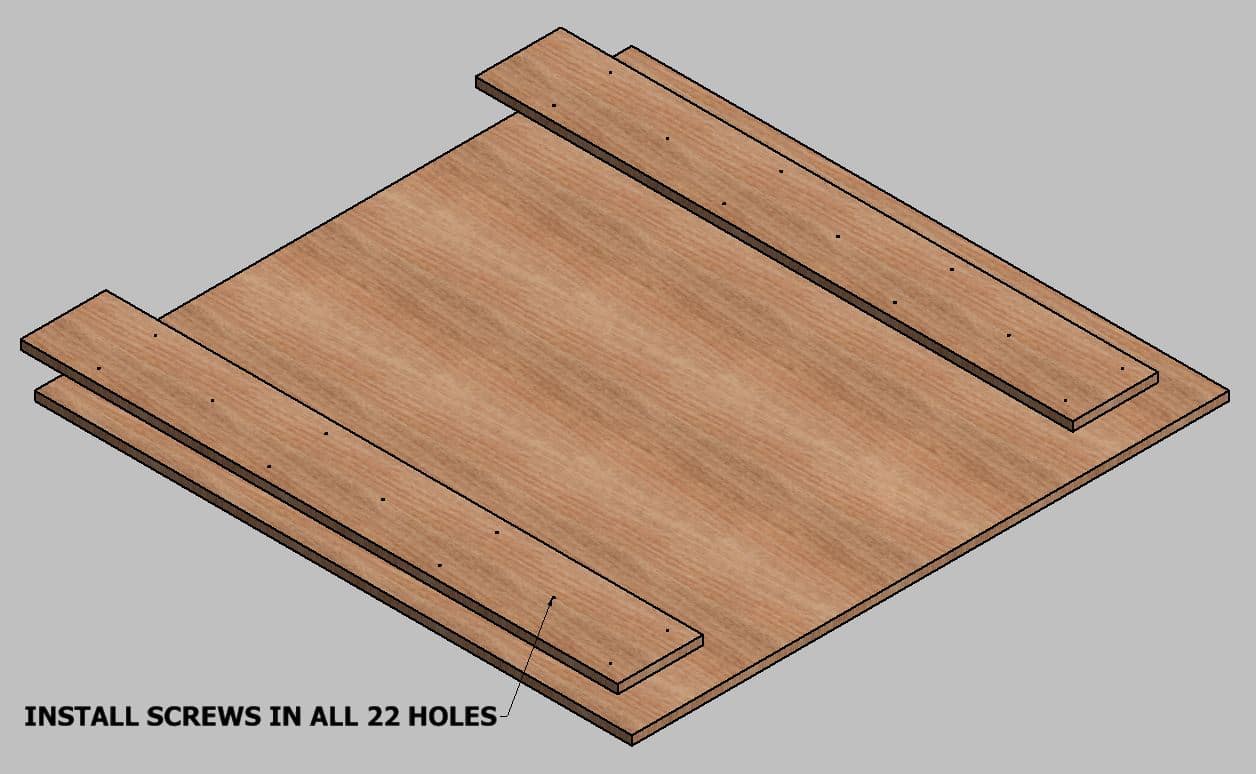
Installing Ground Runners w/ Screws

  • Use 11(ea) 1-1/4″ Deck Screws on each Runner
  • Use a floor or other hard surface
  • Align Runners carefully to marks
  • Stand on Runner when running screws in

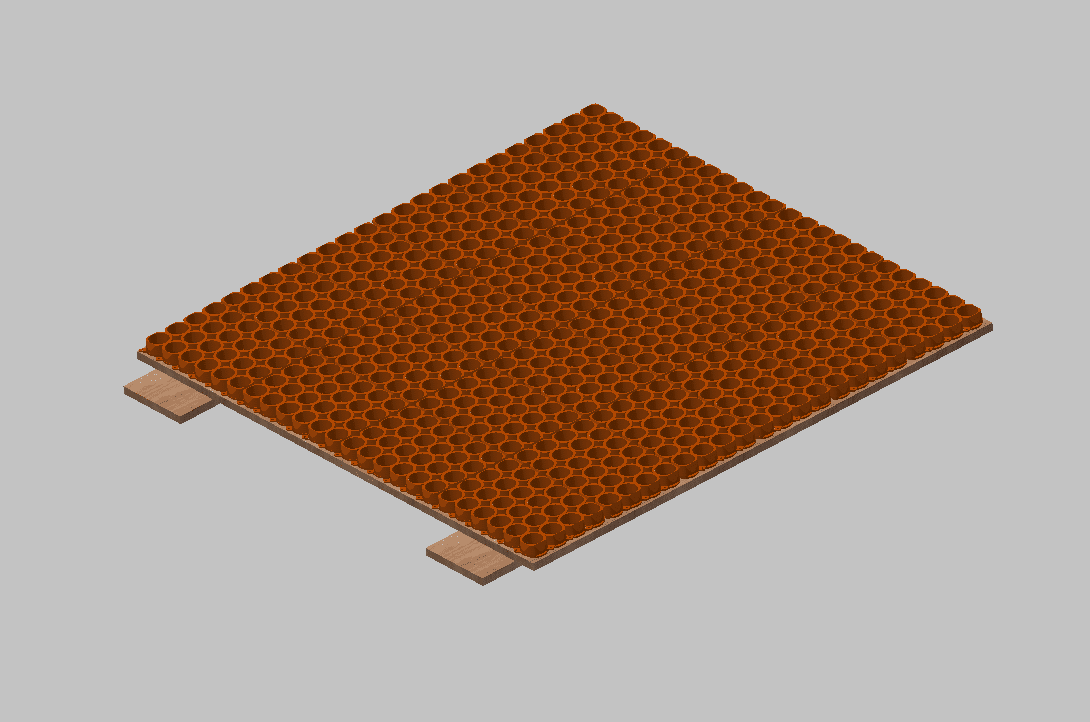
mSnow Tile Plan/Installation

  • 24 mSnow Tiles
  • Interlock Tiles First
  • Then center Tiles on Panel
  • 98 mSnow Screws (provided in Backyard Kit)
  • Screws = #8×1/2″ sheet metal pan head
  • Not every mSnow hole is used
  • Do not use “Shared Holes”
  • Don’t run screws in until they strip
  • Only light clamping pressure required
  • Follow all Instructions contained in your Backyard Kit
  • Don’t cram tiles together when screwing – See THERMAL EXPANSION NOTE in Instructions

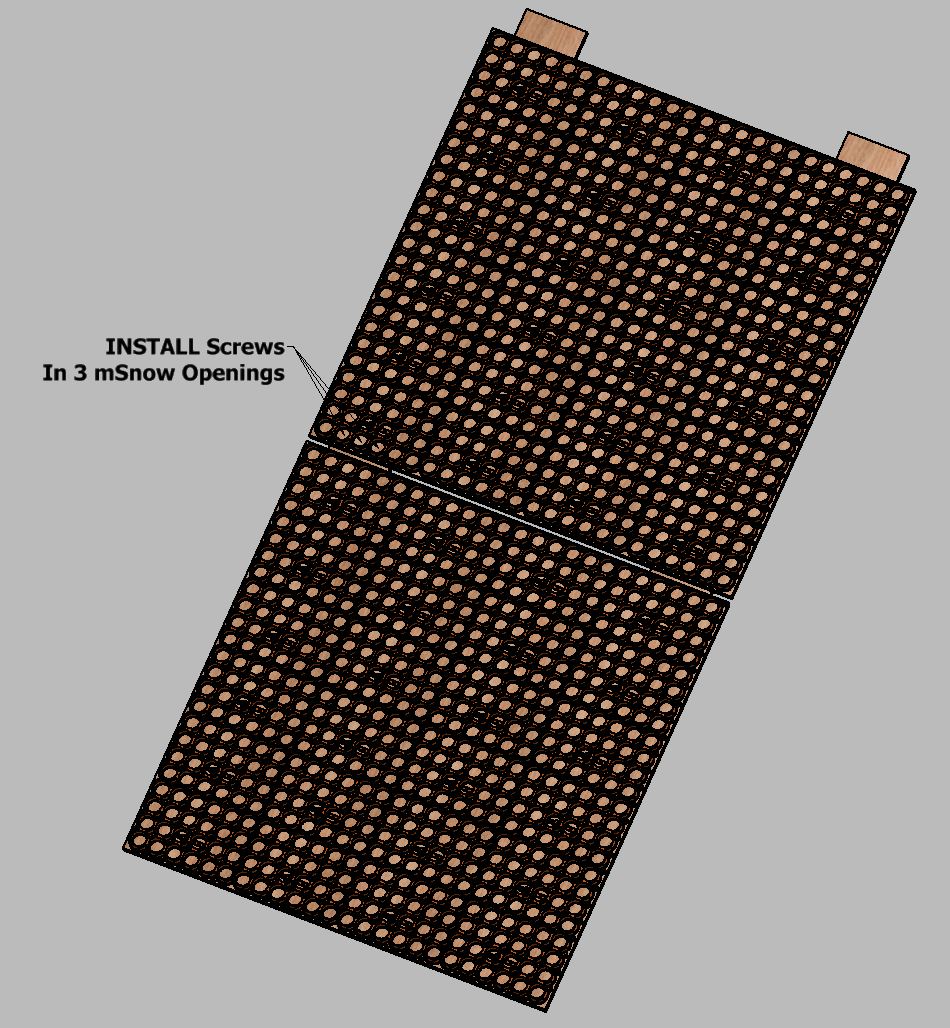
Linking mSnow Panels

  • Panels can be interlocked in a row or with other panels in any orientation
  • Use the openings in the mSnow Tiles to screw panels together
  • Sometimes, you don’t need to screw together, depends on how hard you shred